Now that you've managed to survive these first ten miserable, depressing chapters, you're evermore close to laying out a web-page. In a few chapters time you'll be able to put together a simple web-page, and that starts right here, where we begin to structure our HTML.
The Holy <div> element
The <div> tag, short for division, is used for dividing up your web-page into sections. By default, the <div> element has no special colours, borders, padding or margin. By default it is designed to be as invisible as possible. We use the <div> element to divide our web-page into sections, and then, later, as I will show you shortly, we use CSS to tell those sections exactly how to look.
So, let's say you've designed the very basic look of your page on paper, and you want a banner section, three columns, and a footer section. Something like the following:
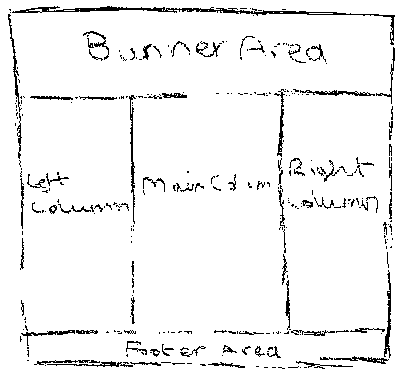
Which means you have five different sections.
- The Banner
- The left column
- The main column
- The right column
- The footer
The HTML document for the above design could look like so:
		<html>

		 <head>

		  <title>My Design</title>

		 </head>

		 <body>

		  <div id="banner">

		   banner section

		  </div>

		  <div id="left-column">

		   left column

		  </div>

		  <div id="main-column">

		   main column

		  </div>

		  <div id="right-column">

		   right column

		  </div>

		  <div id="footer">

		   footer

		  </div>

		 </body>

		</html>
Nice! But ah... What's this ID Attribute?
Giving an element an ID is the way to differentiate that element from all of the other elements of the same kind on the page. When we come to do our CSS, we will use the ID to make the banner have a nice background-image, and to make each of the columns take on the right width, and to give the footer a nice font etc.
You may notice that the above document is very small, no? Admittedly, that's not everything, but it's pretty darn close for the design we've spoke about in this chapter.
At the moment, the above code would output:
Don't panic
There's a reason that looks so dull. Remember, we're going to use CSS to make it look nice shortly! Keep in mind HTML is about the structure of the document. Before we apply some presentation, a little more on structure.
Multiple, similar sub-sections
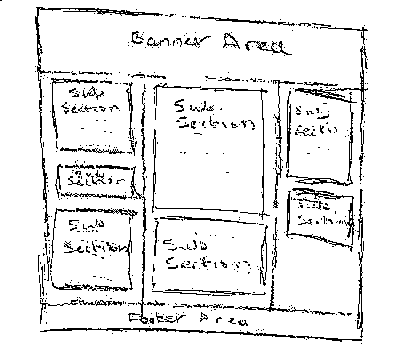
What if you want multiple sections within the column with their own borders and colours. You want each sub-section to look the same, the only difference will be the content of that particular sub-section. It would very well be a complete pain in the A to have to give every single one an Id, even more so to have to use CSS to make every single one look identical! Don't worry, this is covered with the class attribute.
Expanding the above design to adapt the new requirements may well look like this:
The HTML for this document would be very much so like this:
		<html>

		 <head>

		  <title>My Design</title>

		 </head>

		 <body>

		  <div id="banner">

		   banner section

		  </div>

		  <div id="left-column">

		   <div class="sub-section">

		    Sub section

		   </div>

		   <div class="sub-section">

		    Sub section

		   </div>

		   <div class="sub-section">

		    Sub section

		   </div>

		  </div>

		  <div id="main-column">

		   <div class="sub-section">

		    Sub section

		   </div>

		   <div class="sub-section">

		    Sub section

		   </div>

		  </div>

		  <div id="right-column">

		   <div class="sub-section">

		    Sub section

		   </div>

		   <div class="sub-section">

		    Sub section

		   </div>

		  </div>

		  <div id="footer">

		   footer

		  </div>

		 </body>

		</html>
Notice that each sub-section has a class attribute called "sub-section", because we know that each sub-section is going to have the same appearance. Only the content will change.
If the difference between the class attribute and the id attribute is still not making sense to you, it'll all come clear in the next chapter where we apply the CSS!
We won't achieve much with a try it yourself demo just yet, so instead... take the end of chapter quiz, and then in the coming chapters we'll start learning how to give your web-page some actual layout!