Once you have made a template with the complete layout inside it, you then need to modify the links on the sidebars, so that they link to each of the pages you want to have on your website. Let's say you want to have four pages:
- Home - the home page, which will be the first page the visitor sees when they come to visit your website.
- News - a page with updates on the latest happenings on the website.
- About - more detailed information on the purpose of the website.
- Contact - a page with a contact form so the visitor can contact you.
The code for this could be:
		<ul>

		 <li><a href="index.html">Home</a></li>

		 <li><a href="news.html">News</a></li>

		 <li><a href="about.html">About Us</a></li>

		 <li><a href="contact.html">Contact Us</a></li>

		</ul>
Click here to see how this would look on the template we were working with previously.
After modifying the sidebars, make sure
that you've given your site a title by editing the contents of the
<title> tag in the head section, and by sorting out the banner
and footer sections.
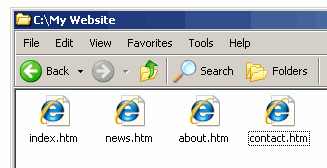
So now you have the page ready to be edited, but in order to create each of the individual pages, you'll need to save your page as each of the new pages. So when viewing the files on your computer, you would hopefully see something like this:
So, this means that each of your files have the template code within them, and the links will point to files which actually exist! So you're web-pages are ready and function perfectly well, now all you have to do is swap the filler text in each of the pages for useful information. Click here to see what I'm talking about.
As you can see, you now have the basic website set up, and all you need to do now is swap the filler text on each of the pages for actual content and information. I hope this has given you an insight into creating a website.
The Site Building Process
The purpose of the last three chapters was to get you thinking about applying the HTML and CSS that you learned previously throughout these tutorials. When you come to create a website however, you need to design it first, making websites on the fly generally produces bad results. It's also good to plan your site a little. What pages are you going to have. What is each page's purpose? The design itself can be as incredibly complicated or as elegantly simple as you like. Don't worry about the code at this stage, just design.
Once you've finished designing the layout, then start thinking about the structure of the web-page. Try to divide up the design into logical sections, and think about how you can use CSS to turn what you have designed into a web-page. After that it's time to put it all together and code the site. You're bound to come across the odd problem here and there, that is normal. When this happens there is plenty of help available on the Internet. You can always use my tutorials as a reference. General Googleing usually gets good results. Simply typing a few words related to your problem may surprise you, you might get the exact solution with code absolutely free. And if you're really, really stuck you can always contact me via my website.
And that... is that!
That's it for these tutorials folks. I hope that you have enjoyed them, and I hope you will continue to refer to them and find them useful in the future. Remember that my colour code page is a handy resource. The Tryout system is also useful for quickly testing out bits of HTML/CSS, so you can also use this one whenever you want to (so you might want to bookmark this page). Finally, if you've found this tutorial useful, and hear of someone else who's looking to learn how to build websites, send them my way eh?